
CAGED and chord tone exercises
Part 4 is going to be a boring but essential set of exercises. That doesn’t mean you can’t make them interesting.
We’re going to jump straight in here with chord tone exercises and maybe mix in some scale ideas. I’ll keep details fairly brief so if something is bugging you or leaving you confused, just reply in the comments and ask whatever you like.
The main goal of these exercises is for you to achieve some fluency with moving around and finding chord tones on the fretboard. If you find some of them too boring then just mess around and spice them up however you like, but try see the value in what you are learning – sometimes slow and boring is the quickest route to improving.
I’ll probably stick with the Ukulele backing track for the most part, I quite like it and it’s a good compliment to finding melodic ideas. If you don’t like it, use any jam track you like. If you want something different and can’t find anything, let me know in the comments and I’ll see if I can quickly knock up some other styles with Band in a Box. We’re not trying to make music here – we’re learning the fretboard!
Exercise: Basic Triads
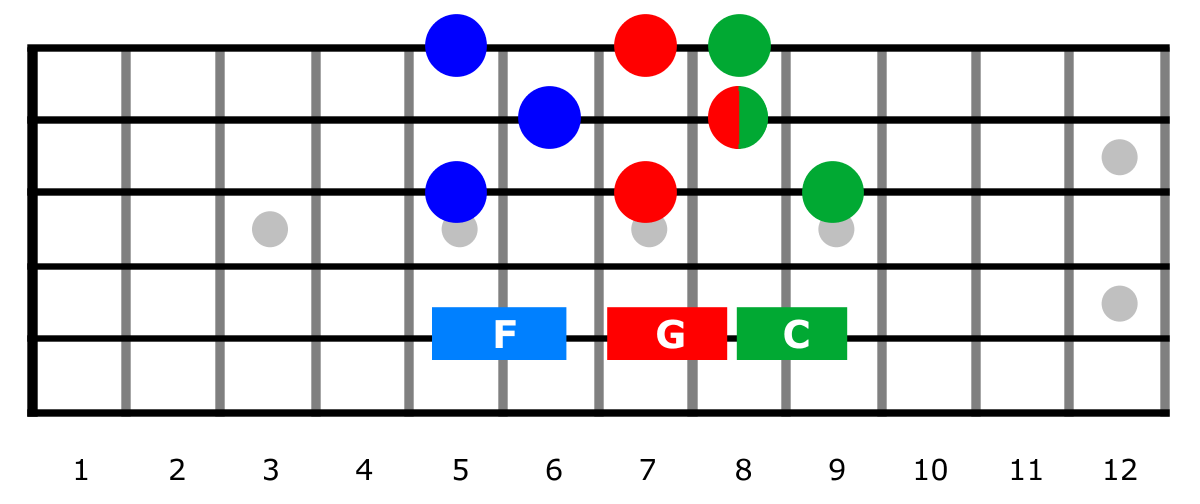
Find as many C triad shapes as you can. The diagram below gives us some ideas of how we can group the notes. There are far too many possibilities to show them all so use your imagination and just learn what you can. You don’t need to know them all, just the more the better. Take your time and jam along to the backing track which is just the C chord playing for five minutes.
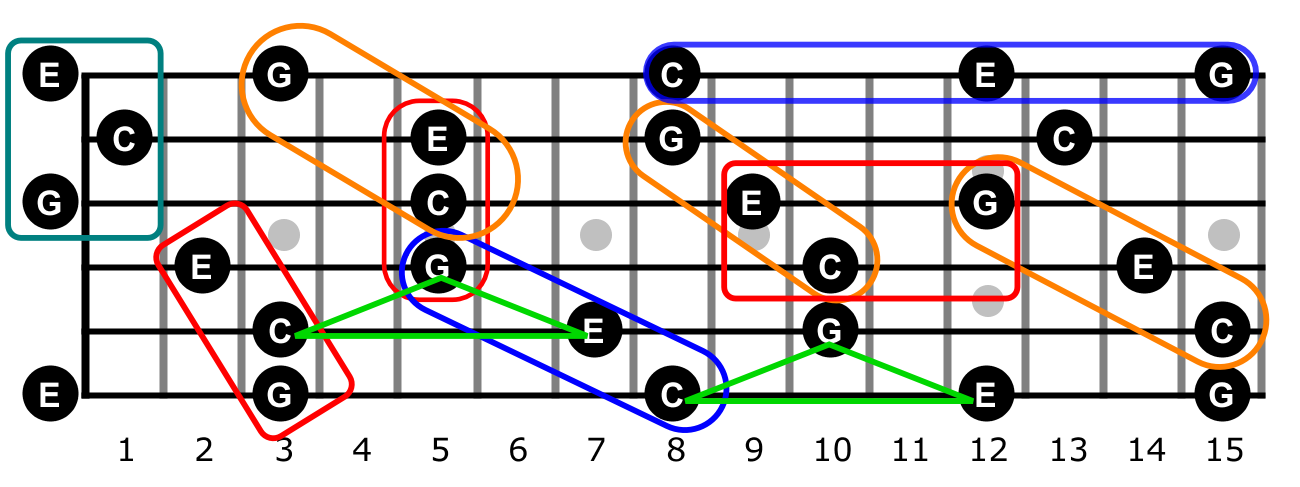
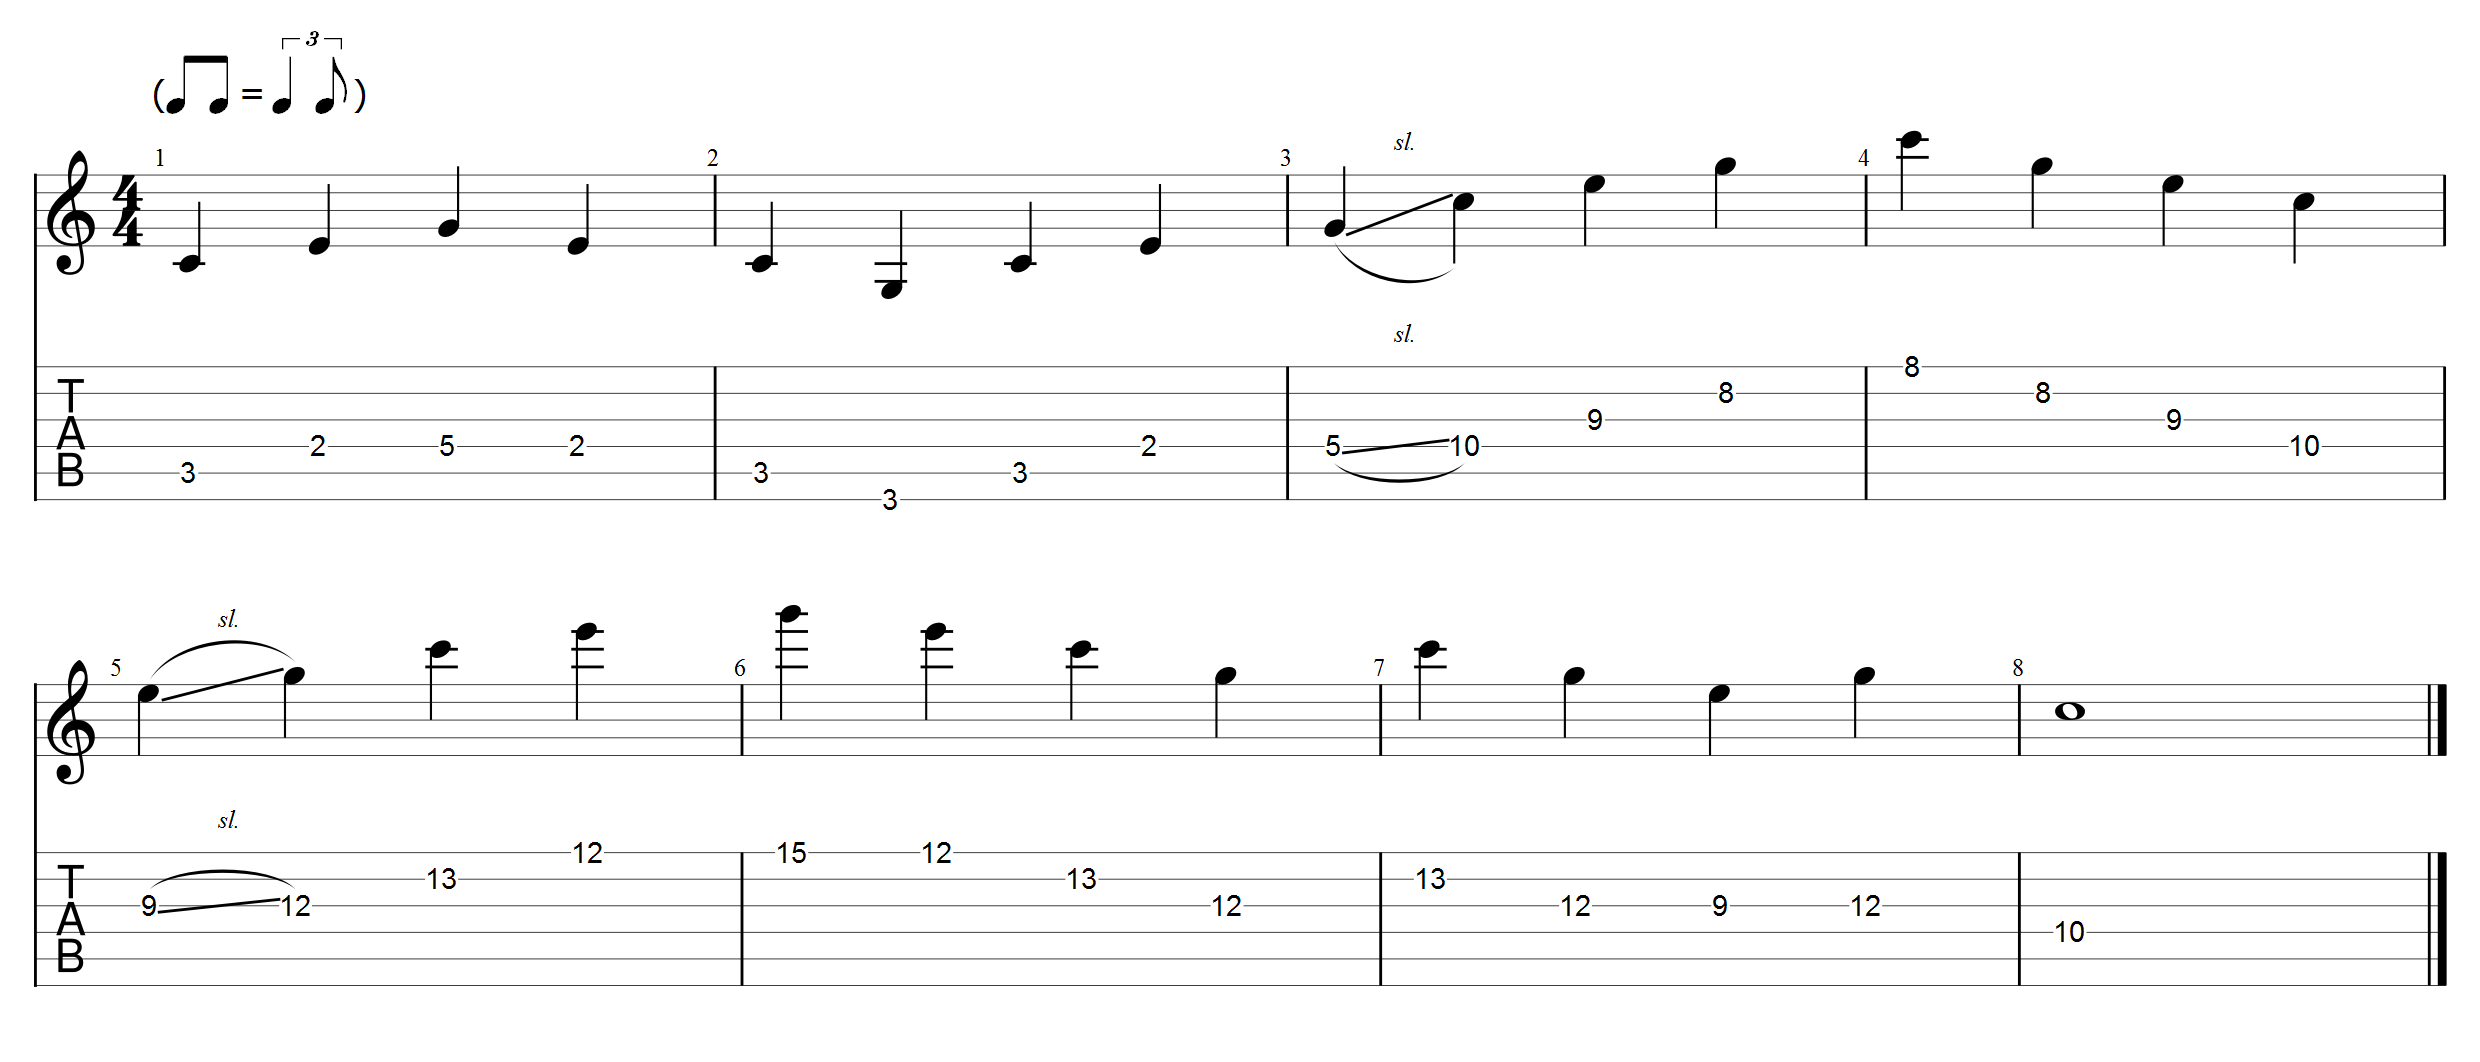
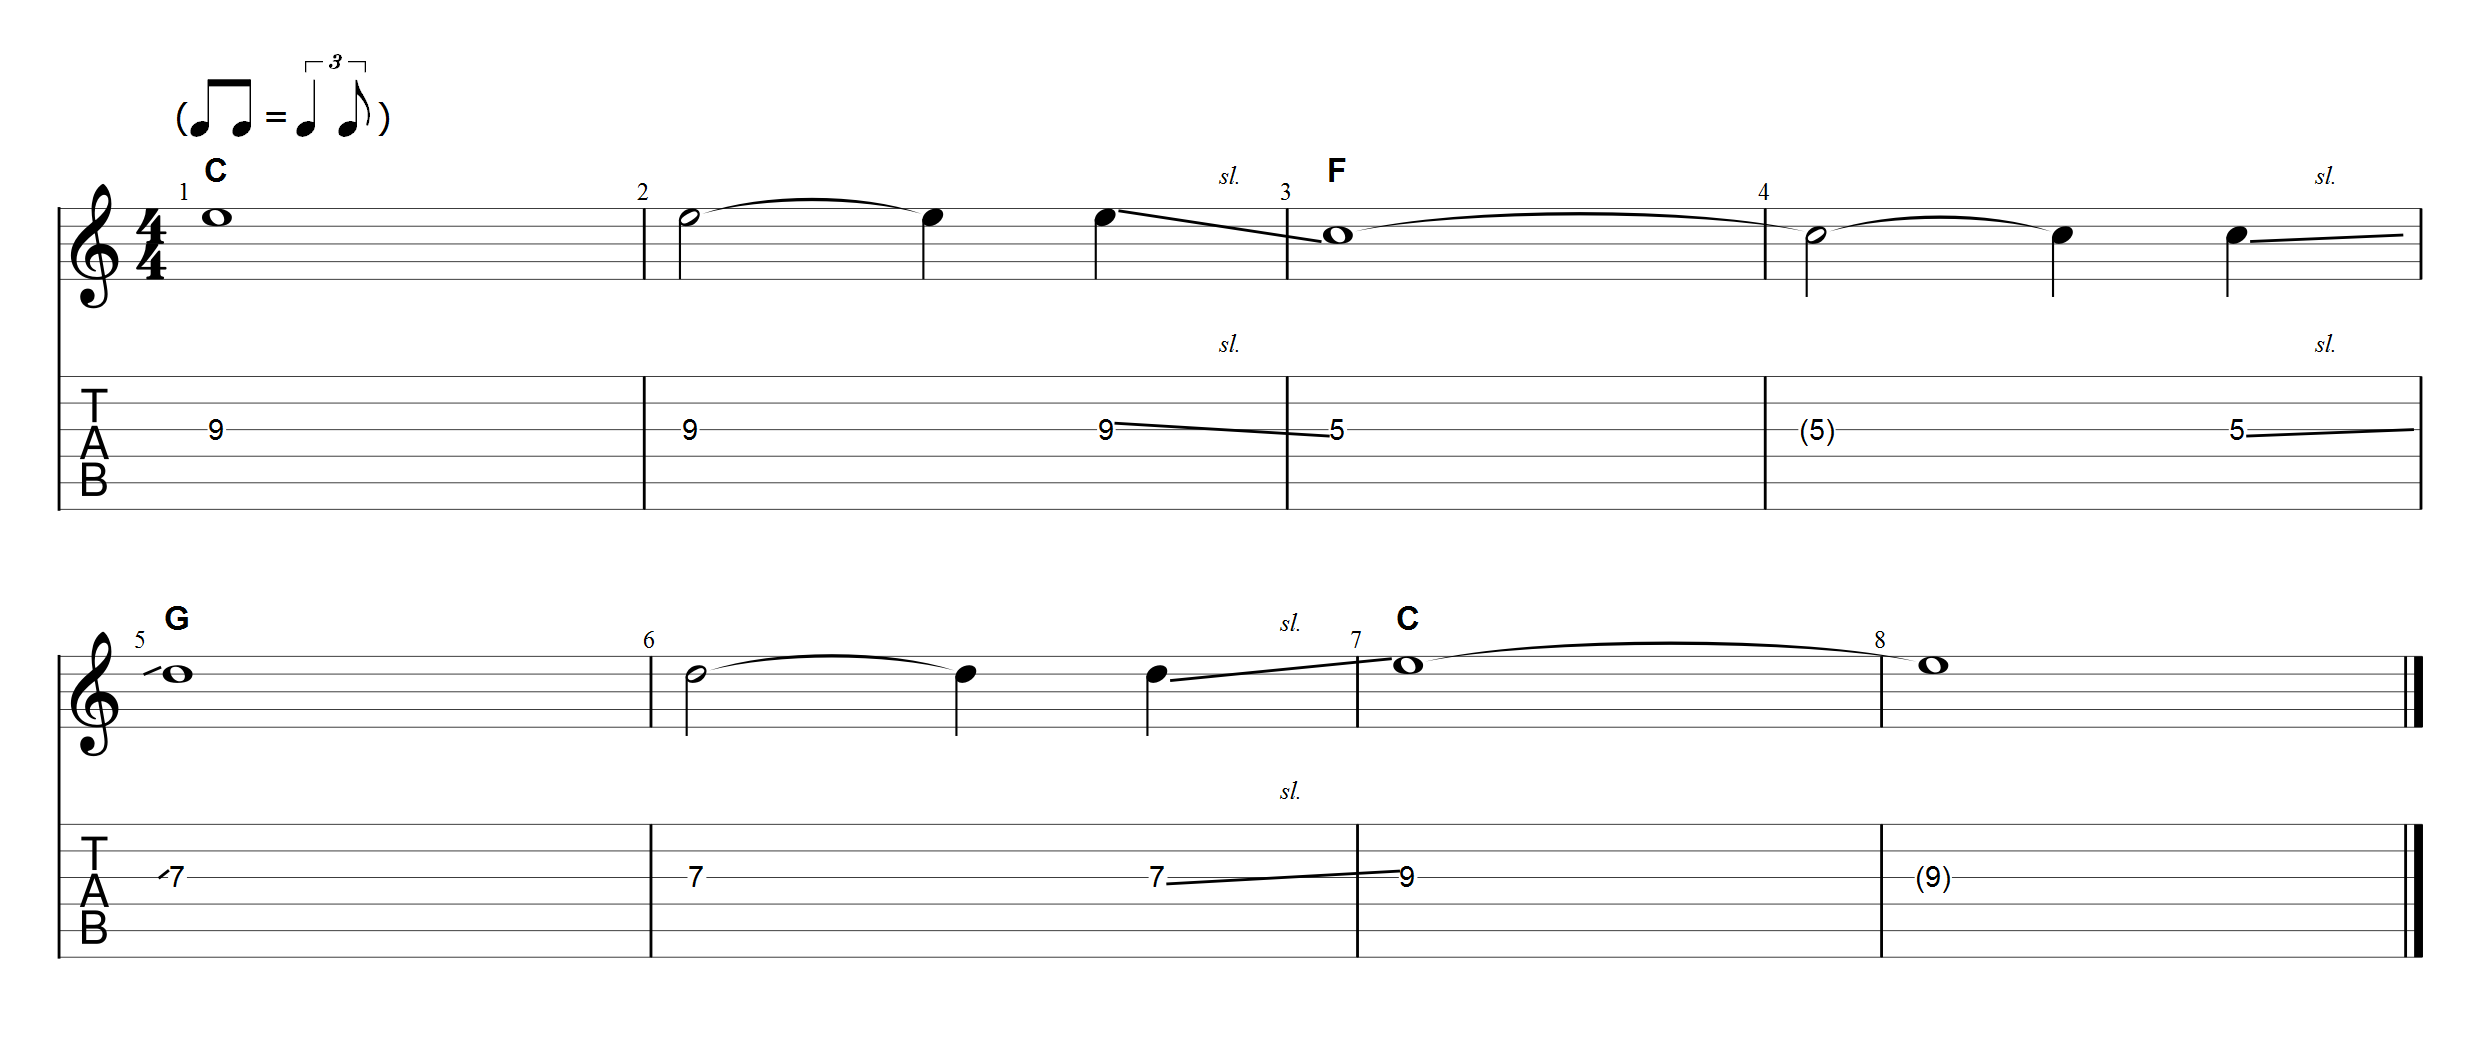
Here’s a basic idea of how I might go about practising something like this. The first TAB is just running through and sliding between random triads picking straight 1/4 notes. The second TAB shows pretty much the same thing but trying to be a little bit more musical with it. It really doesn’t matter what you do here or how you do it but don’t jump ahead of yourself. Simple and slow is the best and quickest way to get this stuff hardwired into your brain. Even if you only do five or ten minutes of this kind of practice everyday, it will pay off for you. Don’t worry, we’ll look at more musical sounding ideas in a moment.

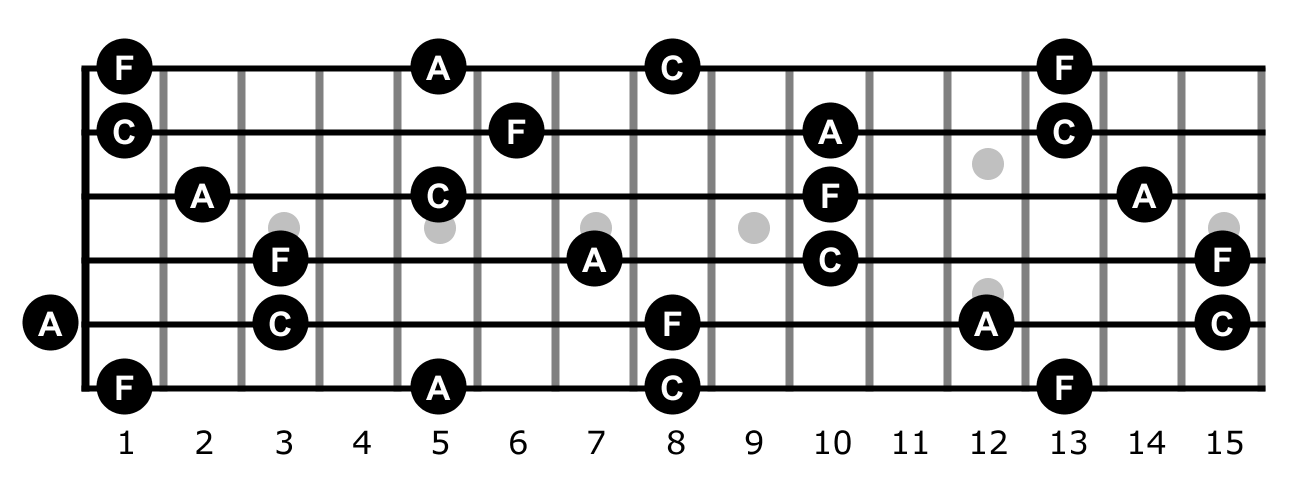
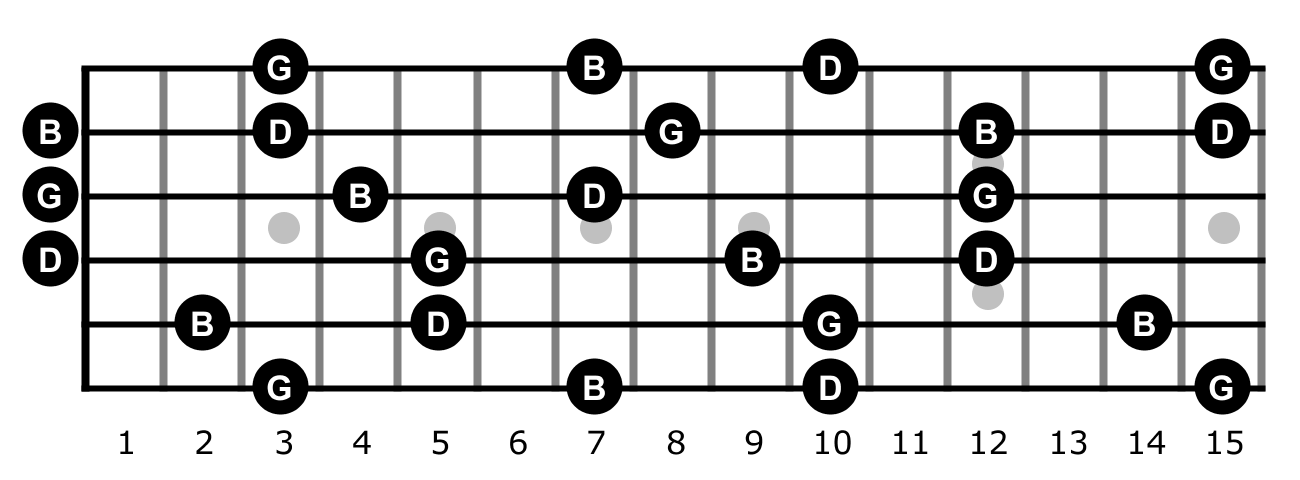
Generally noodle around the fretboard like this and then do the same thing with F and G. Below are the fretboards for F and G, I’ll dispense with the TABs as you should get the idea by now.
Eventually you will want to practise this kind of thing for all keys as well as minor and dominant chords. You can get the fretboard layouts by using the Chord Note Finder. I’ll post up some practice loops for all 12 keys, if I forget, somebody remind me in the comments 🙂
Making It Musical
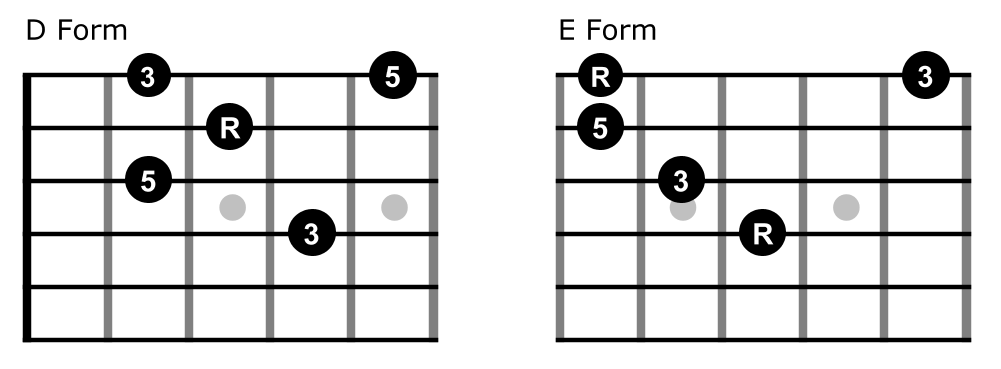
When we practice all of this stuff we typically step through notes sequentially which is great for learning but not so good for sounding like actual music. Everyone has their own idea of what sounds good, bad and boring but spicing things up isn’t really that difficult. The first thing we need to do is simply break things up and the best way to get started with this is to simply play fewer notes (leave some space) and avoid playing each note of a pattern sequentially. The main thing is to try to always remember where and why you are playing a particular note. For example, I could play just one single note from a chord form over the entire chord duration, we don’t have to use every available note. Let’s look at some examples over a C F G chord progression. We’ll use E form over the C and D form over the F and G, all on the first three strings as shown in the diagram below.
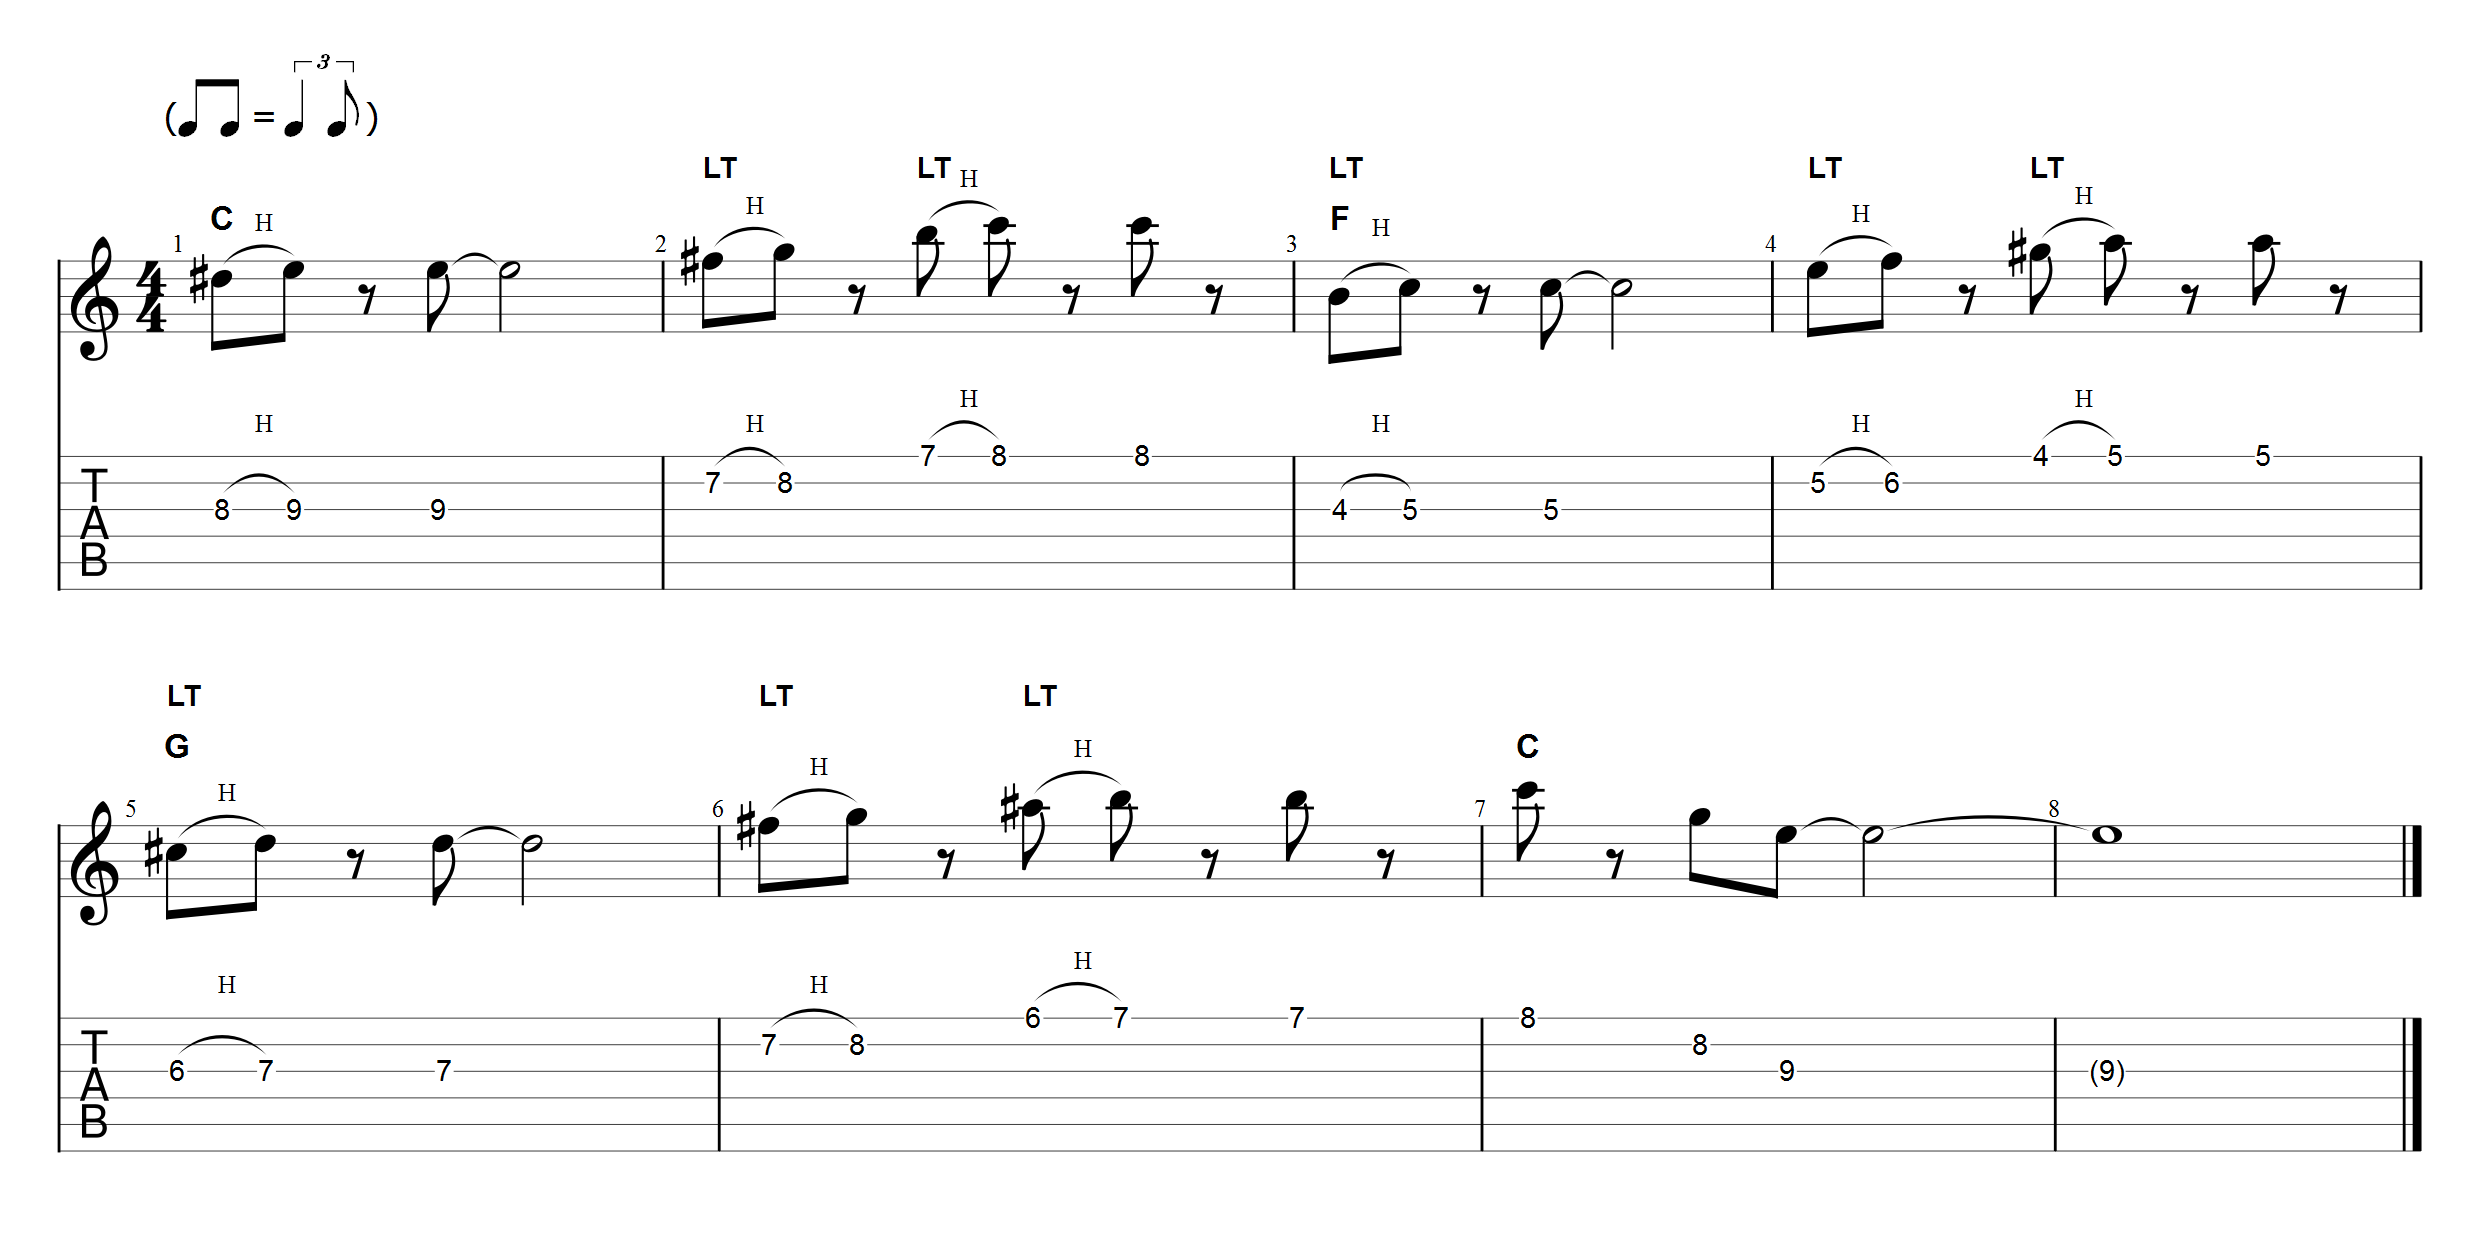
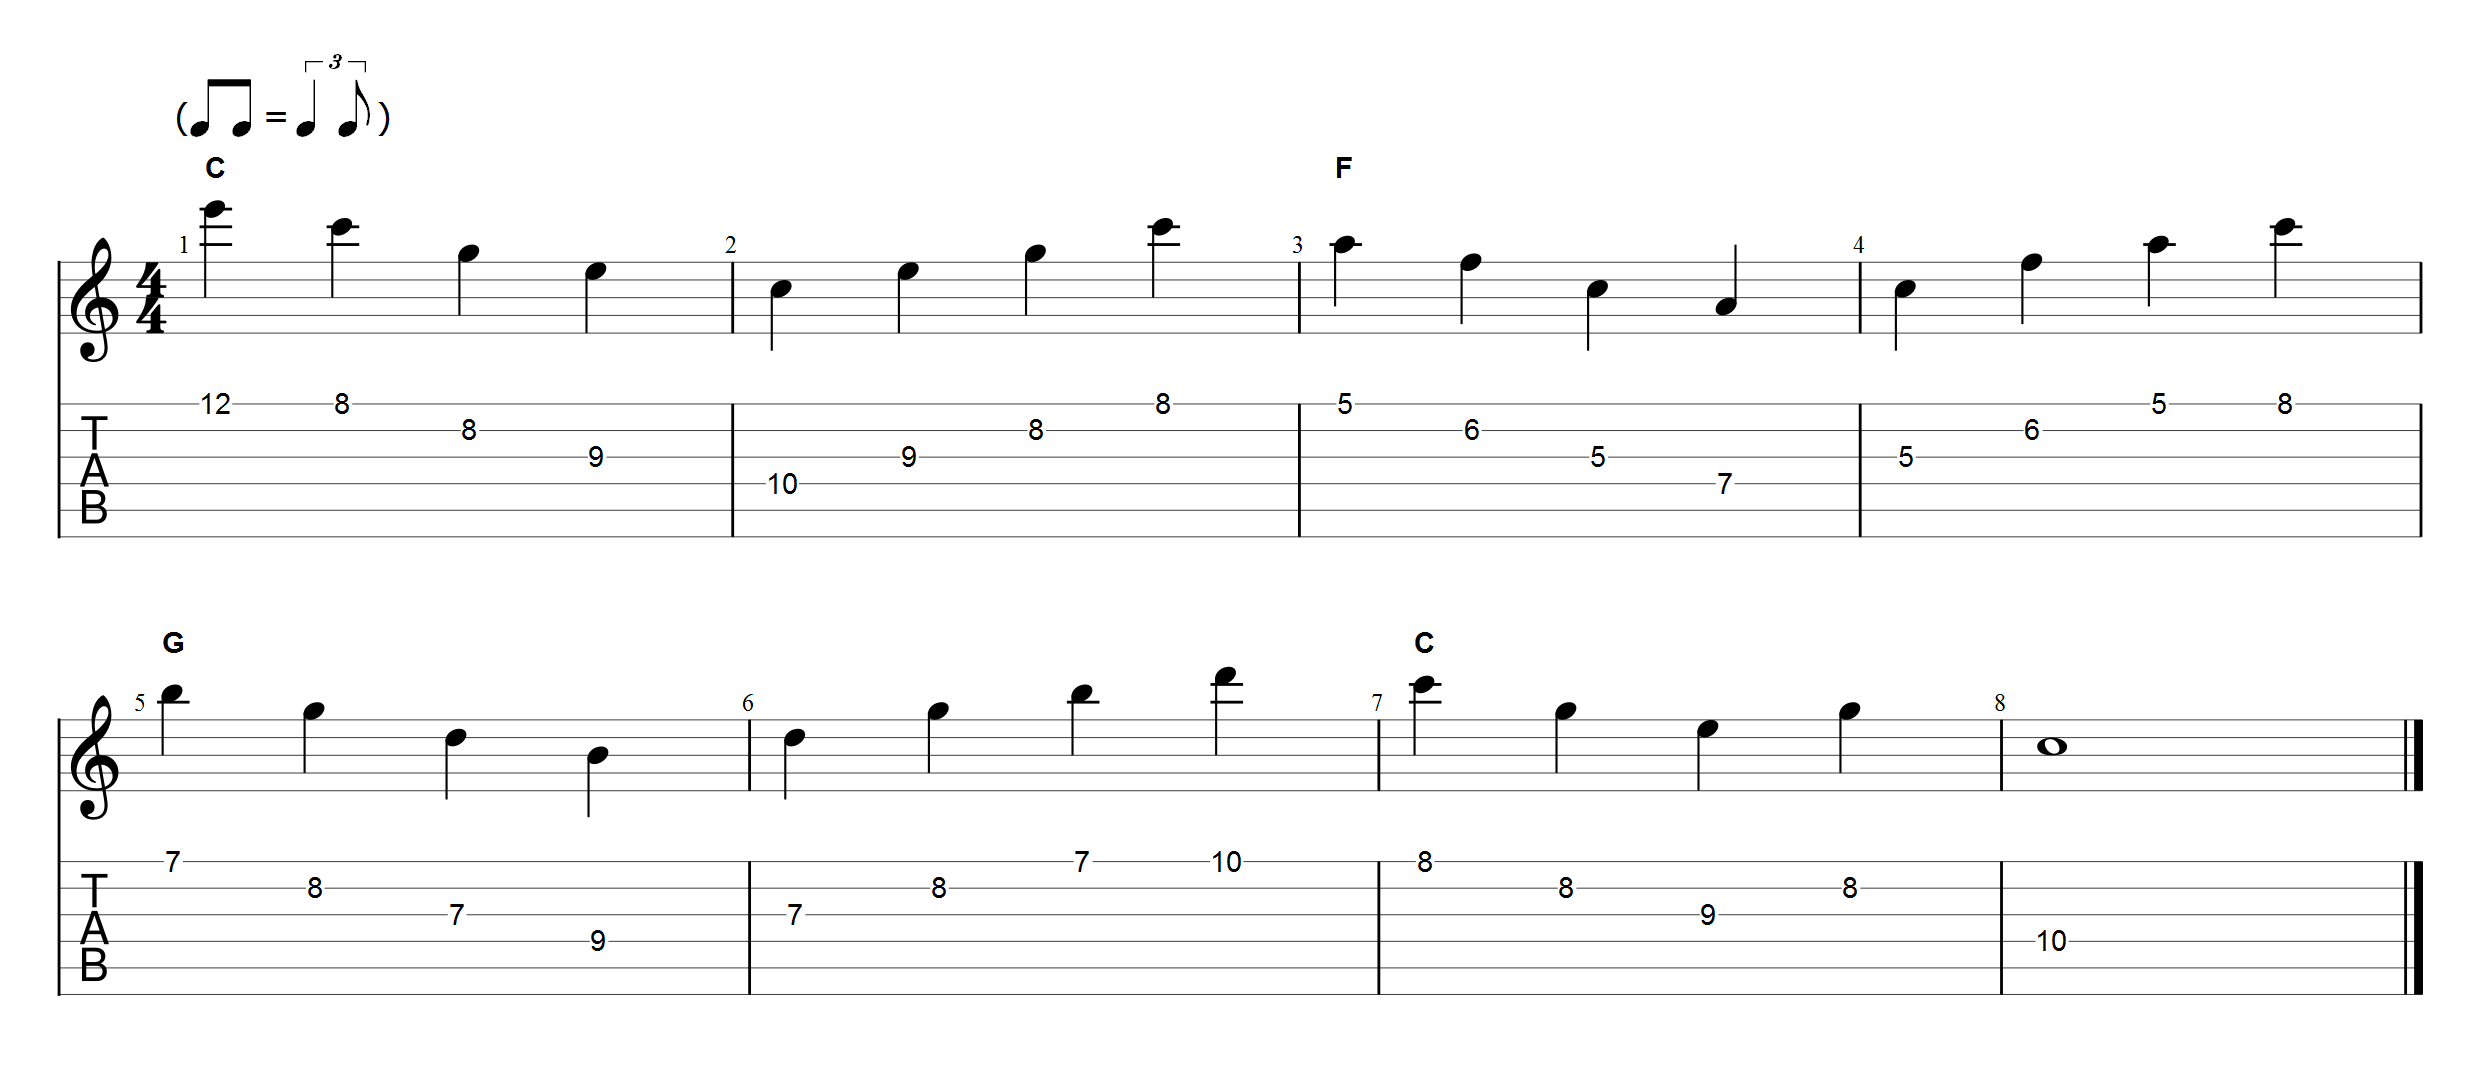
We could play a very simple single note line over each chord using only the notes on the G string.
It’s far from exciting but at least it’s kind of musical sounding. The important thing here is to still be thinking about the chord forms as a whole, even though you are only playing a single note from each chord. Try to keep a mental visualisation firmly in your mind so that you know where you are at all times.
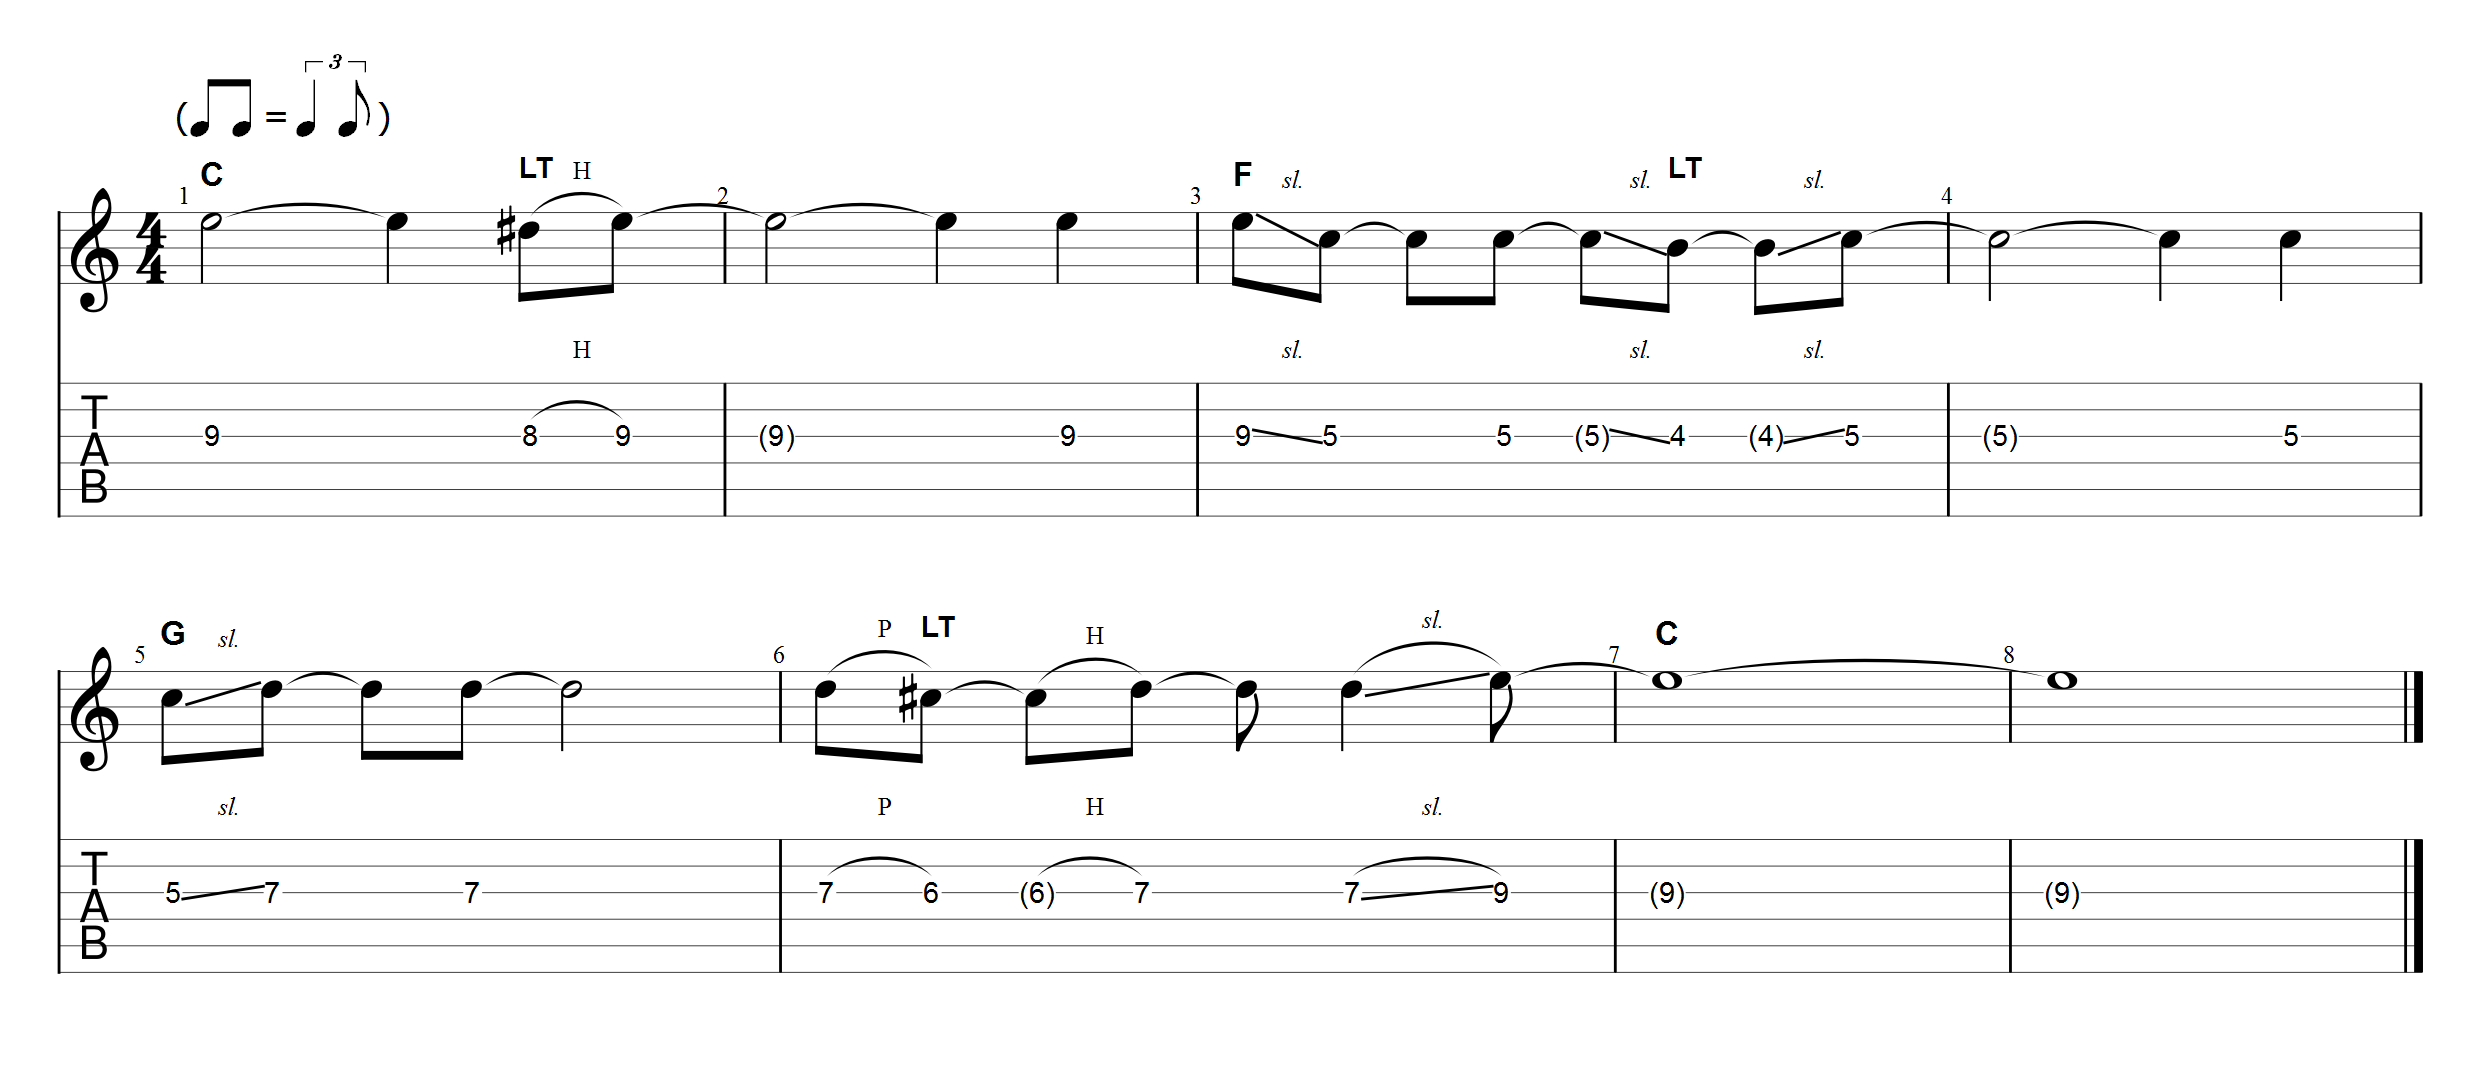
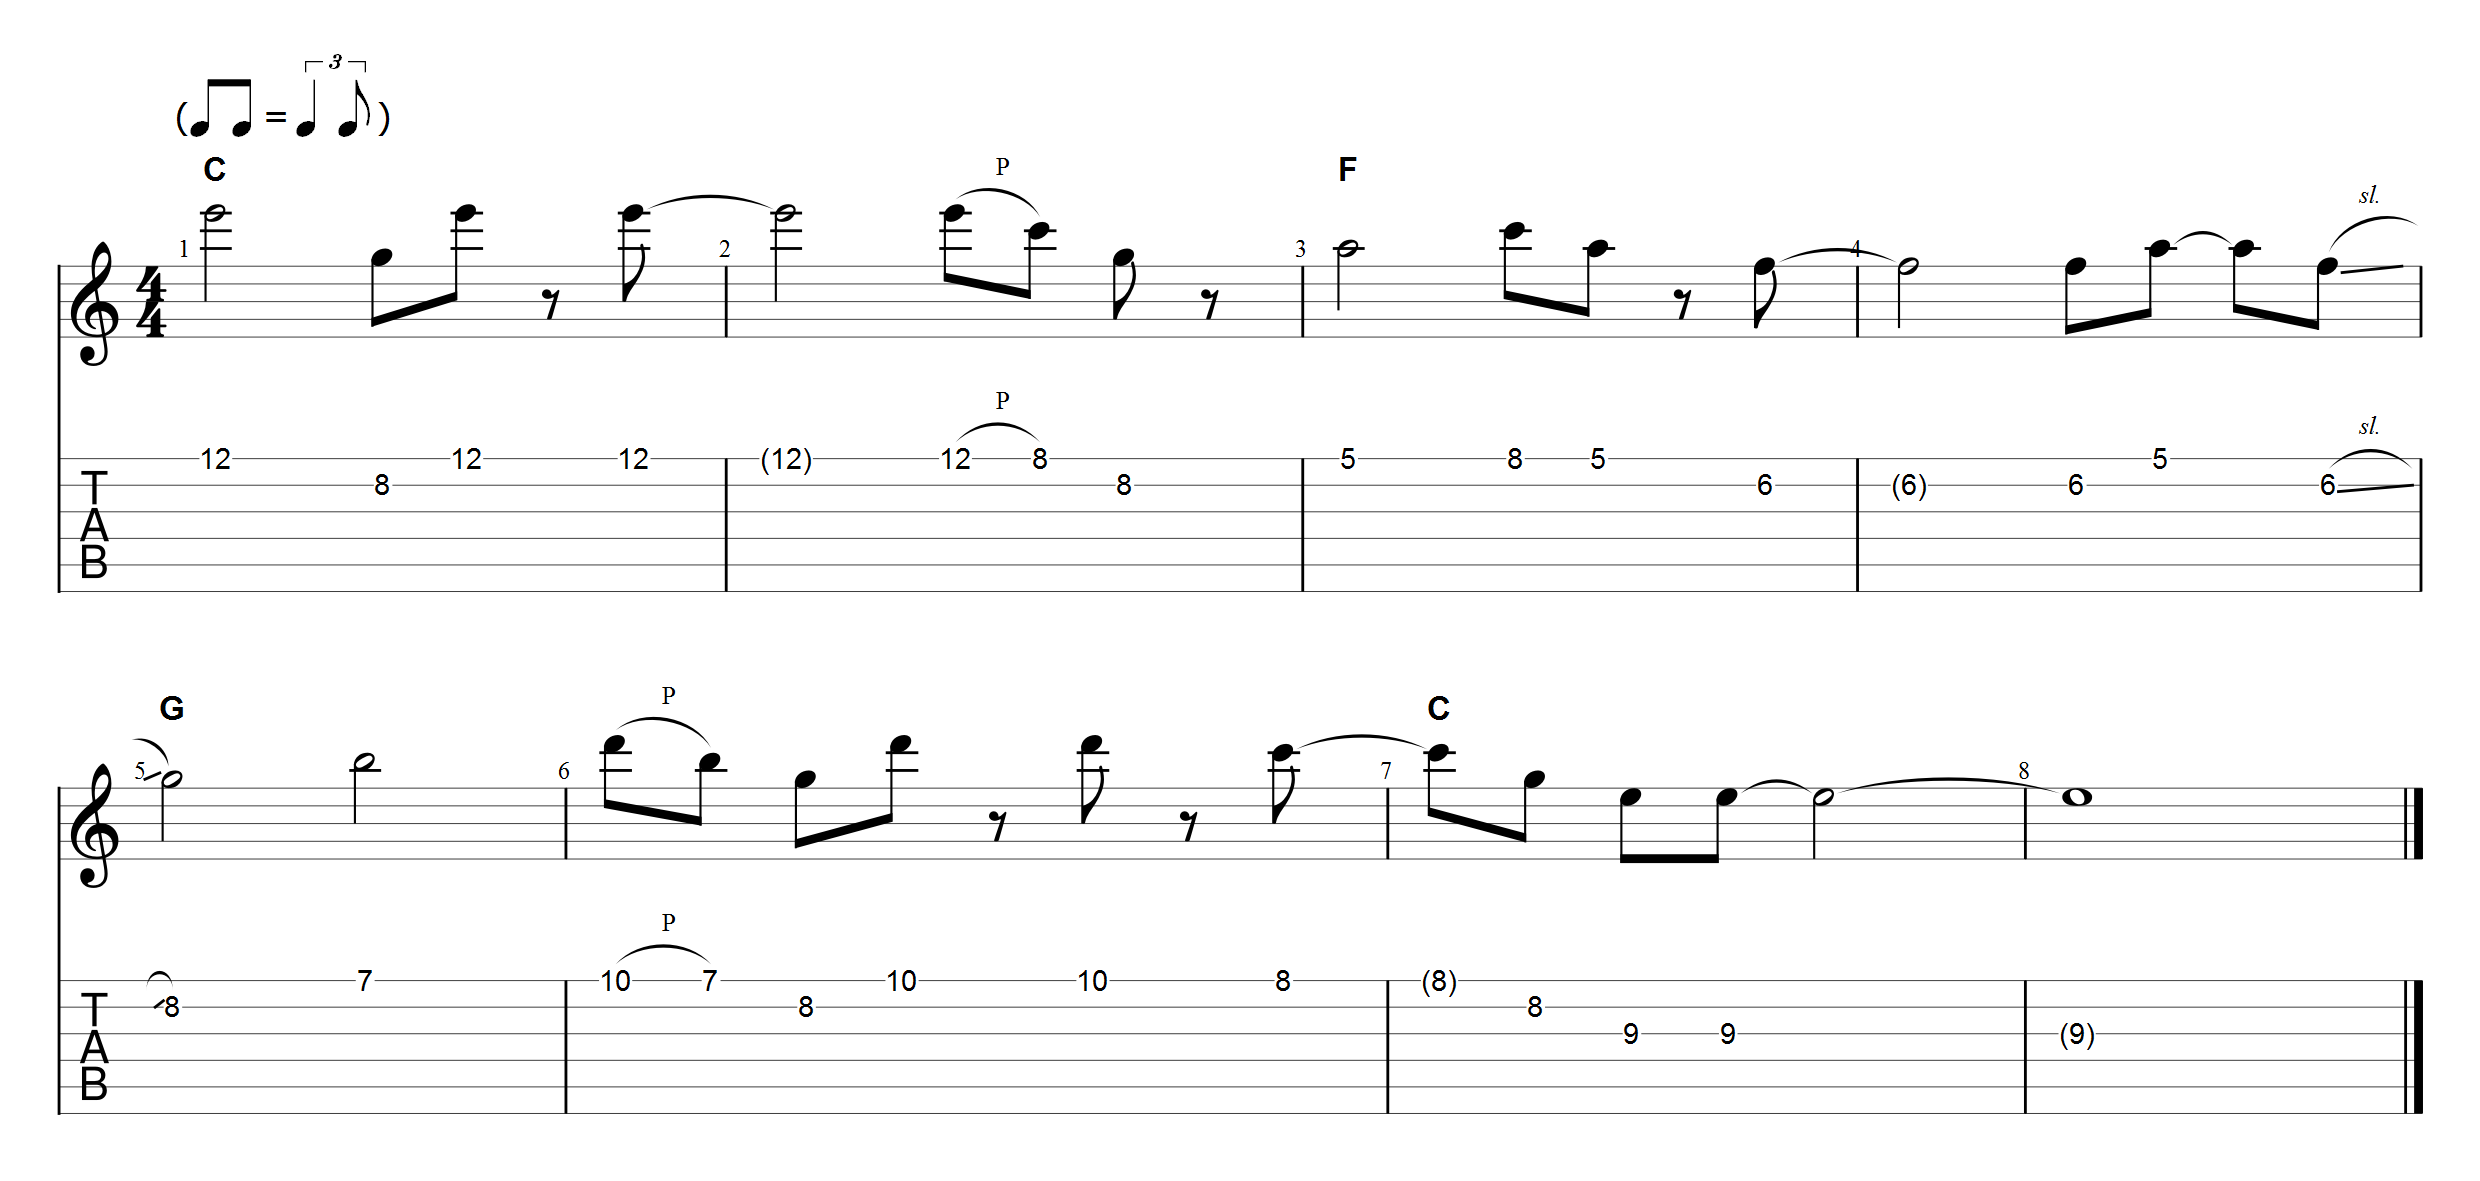
We can make things things slightly more interesting by simply adding some slides and hammer-ons between notes but also we can add a few leading tones. A leading tone, without over-complicating things, is basically a note we can play (a semitone above or below) to lead into another note, just as we discussed in Part 3 – playing the minor third just before the major third. As long as the leading tone isn’t hung on too long and comes right before a good note, then this should work for most chord tones, not just minor to major third and it does not have to be a note that belongs to the key. Think of these as just adding a bit of spice to all of the “good” notes.
Below is an example of using leading tones for each note of the chord forms, shown as LT in the TAB.
Spend some time experimenting with leading tones. You can try them out on scale notes as well as chord tones. They won’t always work but most of the time they will. They usually work best when they are not played on the beat but try all variations anyway. Use them with slides or hammer-ons. I used both in the audio example above but in the TAB I’ve shown them all as hammer-ons. Either way will work, it just adds some subtle differences.
The above example is good for practice but obviously, like everything, it can easily be overdone. The whole point of working with exercises like this is to get you used to doing things until they become a natural part of your playing. All of these little things make a difference. The following example shows the same basic single string idea (used earlier) with a few leading tones and slides added, simple stuff but adds a nice flavour to it.
Most of the ideas used so far have been focused around the first three or four strings of the A, D and E chord forms. We’re going to stick with these small patterns for now because they are fairly easy to learn and also very usable. The next exercise will add a higher octave of one of the chord tones in the D and E form patterns.
Here’s a basic exercise we can use to get used to using them.
Once we’ve practised a bit we can then spice it up slightly in the usual way to make things a bit more melodic. Here’s an example.
There are hundreds of ways we could make up exercises for practising and learning chord tones and you should try to make up as many of your own as you can. We don’t, however, want all of our solos to be purely using chord tones. Although this can often work, we will usually mix things up with some scale playing. In part 5 we’ll look at some pentatonic scale ideas to mess around with.
Go to: Part 1 . . . Part 2 . . . Part 3 . . . Part 4 . . . Part 5

Thanks for a great lesson. I play finger picking rhythm in a band and play a lot of triads, I think that, thanks to you, my playing is going to get a whole lot better.
Many thanks again., keep up the good work.
Thanks Tony, you’re welcome.